One of my favourite things to do on weekends is to potter around the house, rearranging my collections of objects and bits in a ‘still life’ or ‘vignette’. By arranging objects together, you can add layers of personality and small moments of beauty to your home.
Over the years I have learned the tips and tricks to making an arrangement come together.
If you would like to know how to style a vignette at home too, follow the step-by-step guide below.


Left: The finished vignette on a console in my island home. Right: Step 1 – To begin, find a flat surface to build your vignette on.
STEP 1
Find Your Spot
A flat-level surface always helps, as you don’t want any objects you love sliding off and getting broken. This could be a shelf, a mantle, a bedside table – any flat surface to build your vignette on.


Left: Step 2 – Create a bookend to the right using height. I’ve used a second-hand lamp here. Right: Step 3 – Create a bookend on the left using a stack of books.
STEP 2
Add Height
I like to begin by anchoring where I will be displaying my collection, like bookending it, so I know how much room I have to play with.
I found this secondhand lamp on Etsy just recently and it will make a great bookend on the right-hand side as it has a strong form.
I love the quirky height and the texture of the lampshade too.
Find something with height and add it to the right-hand side now.
STEP 3
Add Interest
On the left-hand side I want to create another bookend. I am going to add a stack of books with interesting spines.
The different fonts are really eye-catching. This stack will give me some great height to balance out the lamp on the other side.
My favourite books to collect are old cloth-bound books, usually photography books. They can be found in second-hand shops and are generally inexpensive.
Usually the great covers are hiding under ugly faded dust jackets. So rip those dust jackets off and display some book titles which speak to you.


Left: Step 4 – Add a layer of texture to the centre. I’ve used a woven tray here. Right: Step 5 – Consider the form of your next object. You want to add a curved shape and more layers.
STEP 4
Add A Layer of Texture
I always like to add a surface in the middle of what I am building, like a woven tray.
Adding another texture and breaking up the surface makes whatever you place on that tray feel really special and precious.
STEP 5
Consider Form
I like to then add a gentle feminine form to soften the hard masculine stack of books – a curved ceramic vessel. A vessel like this is great, as it can also hold water, which makes it a great vase and point of interest.
I’ve also added some books to the tray. The more layers you can add to surfaces, the warmer the mood you create.


Above: Step 6 – Introduce leading lines and repetition.
STEP 6
Introduce Leading Lines With Nature and Add Repetition
It really is the most important step to creating any vignette, adding life.
I added this banksia branch from the backyard, but I made sure to point the leaves inwards to the vignette.
It’s important to remember adding elements like this creates leading lines for your eye to either stay within or leave. You want to always be creating leading lines into the still life.
Adding multiples and things en masse like these nautilus shells brings a layer of abundance and interest.
Anything in multiples feels special and fossicked for.
Again, be mindful of the placement, as this too can create leading lines that can point your eye out of the frame.


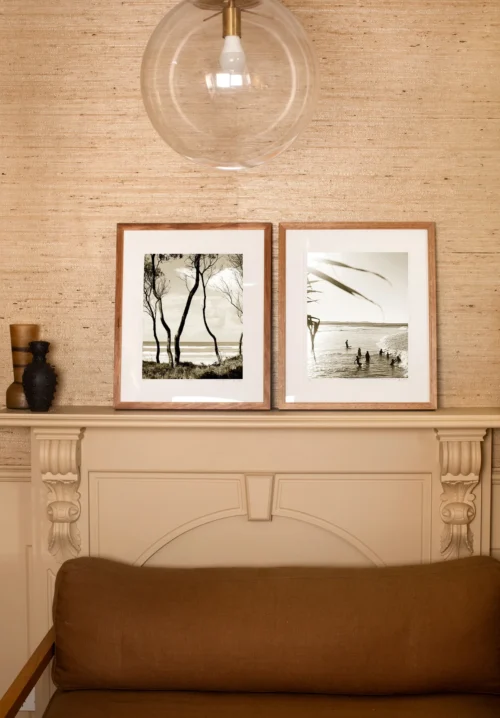
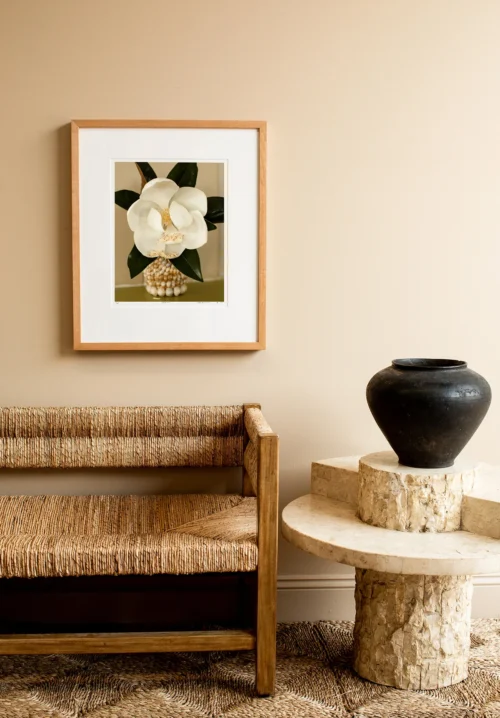
Left: Step 7 – Add depth and fill the space. I’ve used this framed print from my collection. Right: Step 8 – Make it personal. You can see here I have added an extra layer using the small square frame.
STEP 7
Add Depth
It is time to add some depth.
This can be achieved by adding framed works – a mirror, a framed photograph, something which draws you in closer and fills the space. The print I added is called ‘Seashell Still Life’ from my print collection.
I like having these pieces on ‘the lean’ rather than hung on the wall. It feels more personal and intimate and makes it appear as though you didn’t try too hard.
STEP 8
Make It Personal
The most important thing to remember is that it is your story, so make it personal.
This is not a showroom, it’s your home. The story of your life.
You can see in the finished vignette I added one more small framed piece to add extra depth and personality.